Makeup Artist Tips
I have been asked this week, several times, what my best tip's and trick's are as a Professional Makeup Artist.
I seriously had to rack my brains. I have so much makeup information running around up there, it was hard to slow it all down and catch it!
So, I have narrowed it all down and have chosen a few of my favourite behind the scenes hints and tips.
1) Use an eye primer to keep eye makeup on. Yes, yes it works. But I still get people complaining that their shadow is still creasing. Now, take it from someone who has seen some seriously greasy eyelids. Mine being one of them.
You need to follow these tips too.
DO NOT, under any circumstances, moisturise your eyelids before applying it. Why would you? Greasy eyelids will just break the product down. What a waste of time applying it.
Apply to a clean, dry, oil free eyelid, with a brush. Yes, brush. Your fingers contain natural oils, and again will break down the primer.
Oil free lid + brush + primer = happy eyeshadow.
See my bridal makeup blog for my eye primer recommendations
http://rutheblogger.blogspot.co.uk/2012/03/here-comes-bride.html
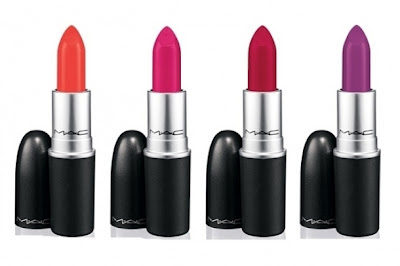
2) Always try lipsticks on your lip's, not your hand. Your lip's are a different colour to your hand, so it will never look the same. If your lips are warmer, that pink lipstick you're eyeing up may come out chalky on your lips.
If you have a naturally lighter lip colour, then the darker lip colour you like, will be very strong.
Try before you buy. If you really want the colour of the lipstick to be true, blank out your natural lip colour with lip erase or concealer before hand.
3) Has your fake tan streaked? Going out later in the evening? Use some gradual, moisturiser tan. Rub it over the streaks. By the evening your streaks should have disappeared. To prevent streaking in the first place put this tip into practice straight away, Apply your fake tan, then straight after, rub some gradual tan on top. The next morning your tan will have intensified and should be streak free.
 |
| Dove gradual tan. My first choice. |
4) In a rush? Use your favourite lipstick as a blusher and lip colour.
5) Use a matte, face powder one or two shades darker than your skin as a contour powder. Great for use under cheekbones, or to 'shape' eyelids. Blend blend blend......
6) Always keep your lip and cheek in the same colour family.
7) Darkness and light. Anything dark in the makeup world, retratcts, minimises. Want to fake Kate Moss' cheekbones? Use a darker powder in the hollows of your cheeks. Want to slim the nose down? Use a darker powder on each side....
Highlighter bounces light away. So use it above your cheekbones to accentuate and 'PUSH FORWARD'
The best way I can describe this theory to people is like this. Darkness, makes features 'fall back' If you add darkness on the face, you will create a shadow. This is why we use crease colours on the eyelid, or bronzer in the hollows of the cheek.
Light brings features 'forward' Use brighter colours to 'open' an eye. If your eyes are more sunken, brighter, lighter colour's are great at bringing the eye 'forward'
A classic example of this highlighting / shading technique is the cheekbone 'trick'
Use a dark, matte ( remember shimmer / lighter products reflect light ) powder as a contour powder. Use this under your cheekbone. Blend until you are happy with the effect.
Use a highlighter, anything light, bright, shimmery or dewy on the top part of the cheekbone. Use this product in a 'C' shape from the brow bone, around to the top of the cheekbone.

A little thing you may notice, when you look at pictures of celebrities, is this.
A lot seem to have a lighter 'panel' through the centre of the face. the T zone, if you like. Then around the hairline, jaw and under the neck always seems warmer.
( Seriously, check out google images, it is subtle, but when you look for it, you will notice it )
Why do you think that is?
What does light do?
What does dark do?
Using light in the centre of the face enhances features, as the warmer colour around the jawline and hairline pulls everything in. This technique is almost like a mini facelift! And is sometimes referred to as the 'halo effect'.
This can be achieved with two different foundations, but it is so much easier to just use a highlighter and bronzer!
Do you have any other things you would like to ask? Maybe you have your own beauty / makeup query?
RuthE
x

Love the tip for fake tan streaks, that's one I haven't heard before.
ReplyDeleteThanks! :]
You're welcome! It really work's! Great for this weather we are having.
DeleteI love your eye makeup in this pic!
RuthE
x
This comment has been removed by the author.
ReplyDelete